

Week 5: Sew Straight Blocks
WEEK 5: SEW STRAIGHT BLOCKS
You did it! You made it through the curves! From here on out it’s very smooth sailing on your Looper quilt. This week we’ll be sewing our straight blocks.
But first, the prize: this week you could win a pink Mini Project Iron provided by Oliso!! These things are SO cute! Details for how to enter at the end of the post.


SEW BLOCK B
There are three blocks in Looper: A1&2, B and C. You did the curved A1&2 last week, and you did C when you cut out the background fabric, so that means that for throw and queen sizes, only one remains - B! (The baby quilt only has A1&2 blocks, so keep working on those if you’re making a baby size.)
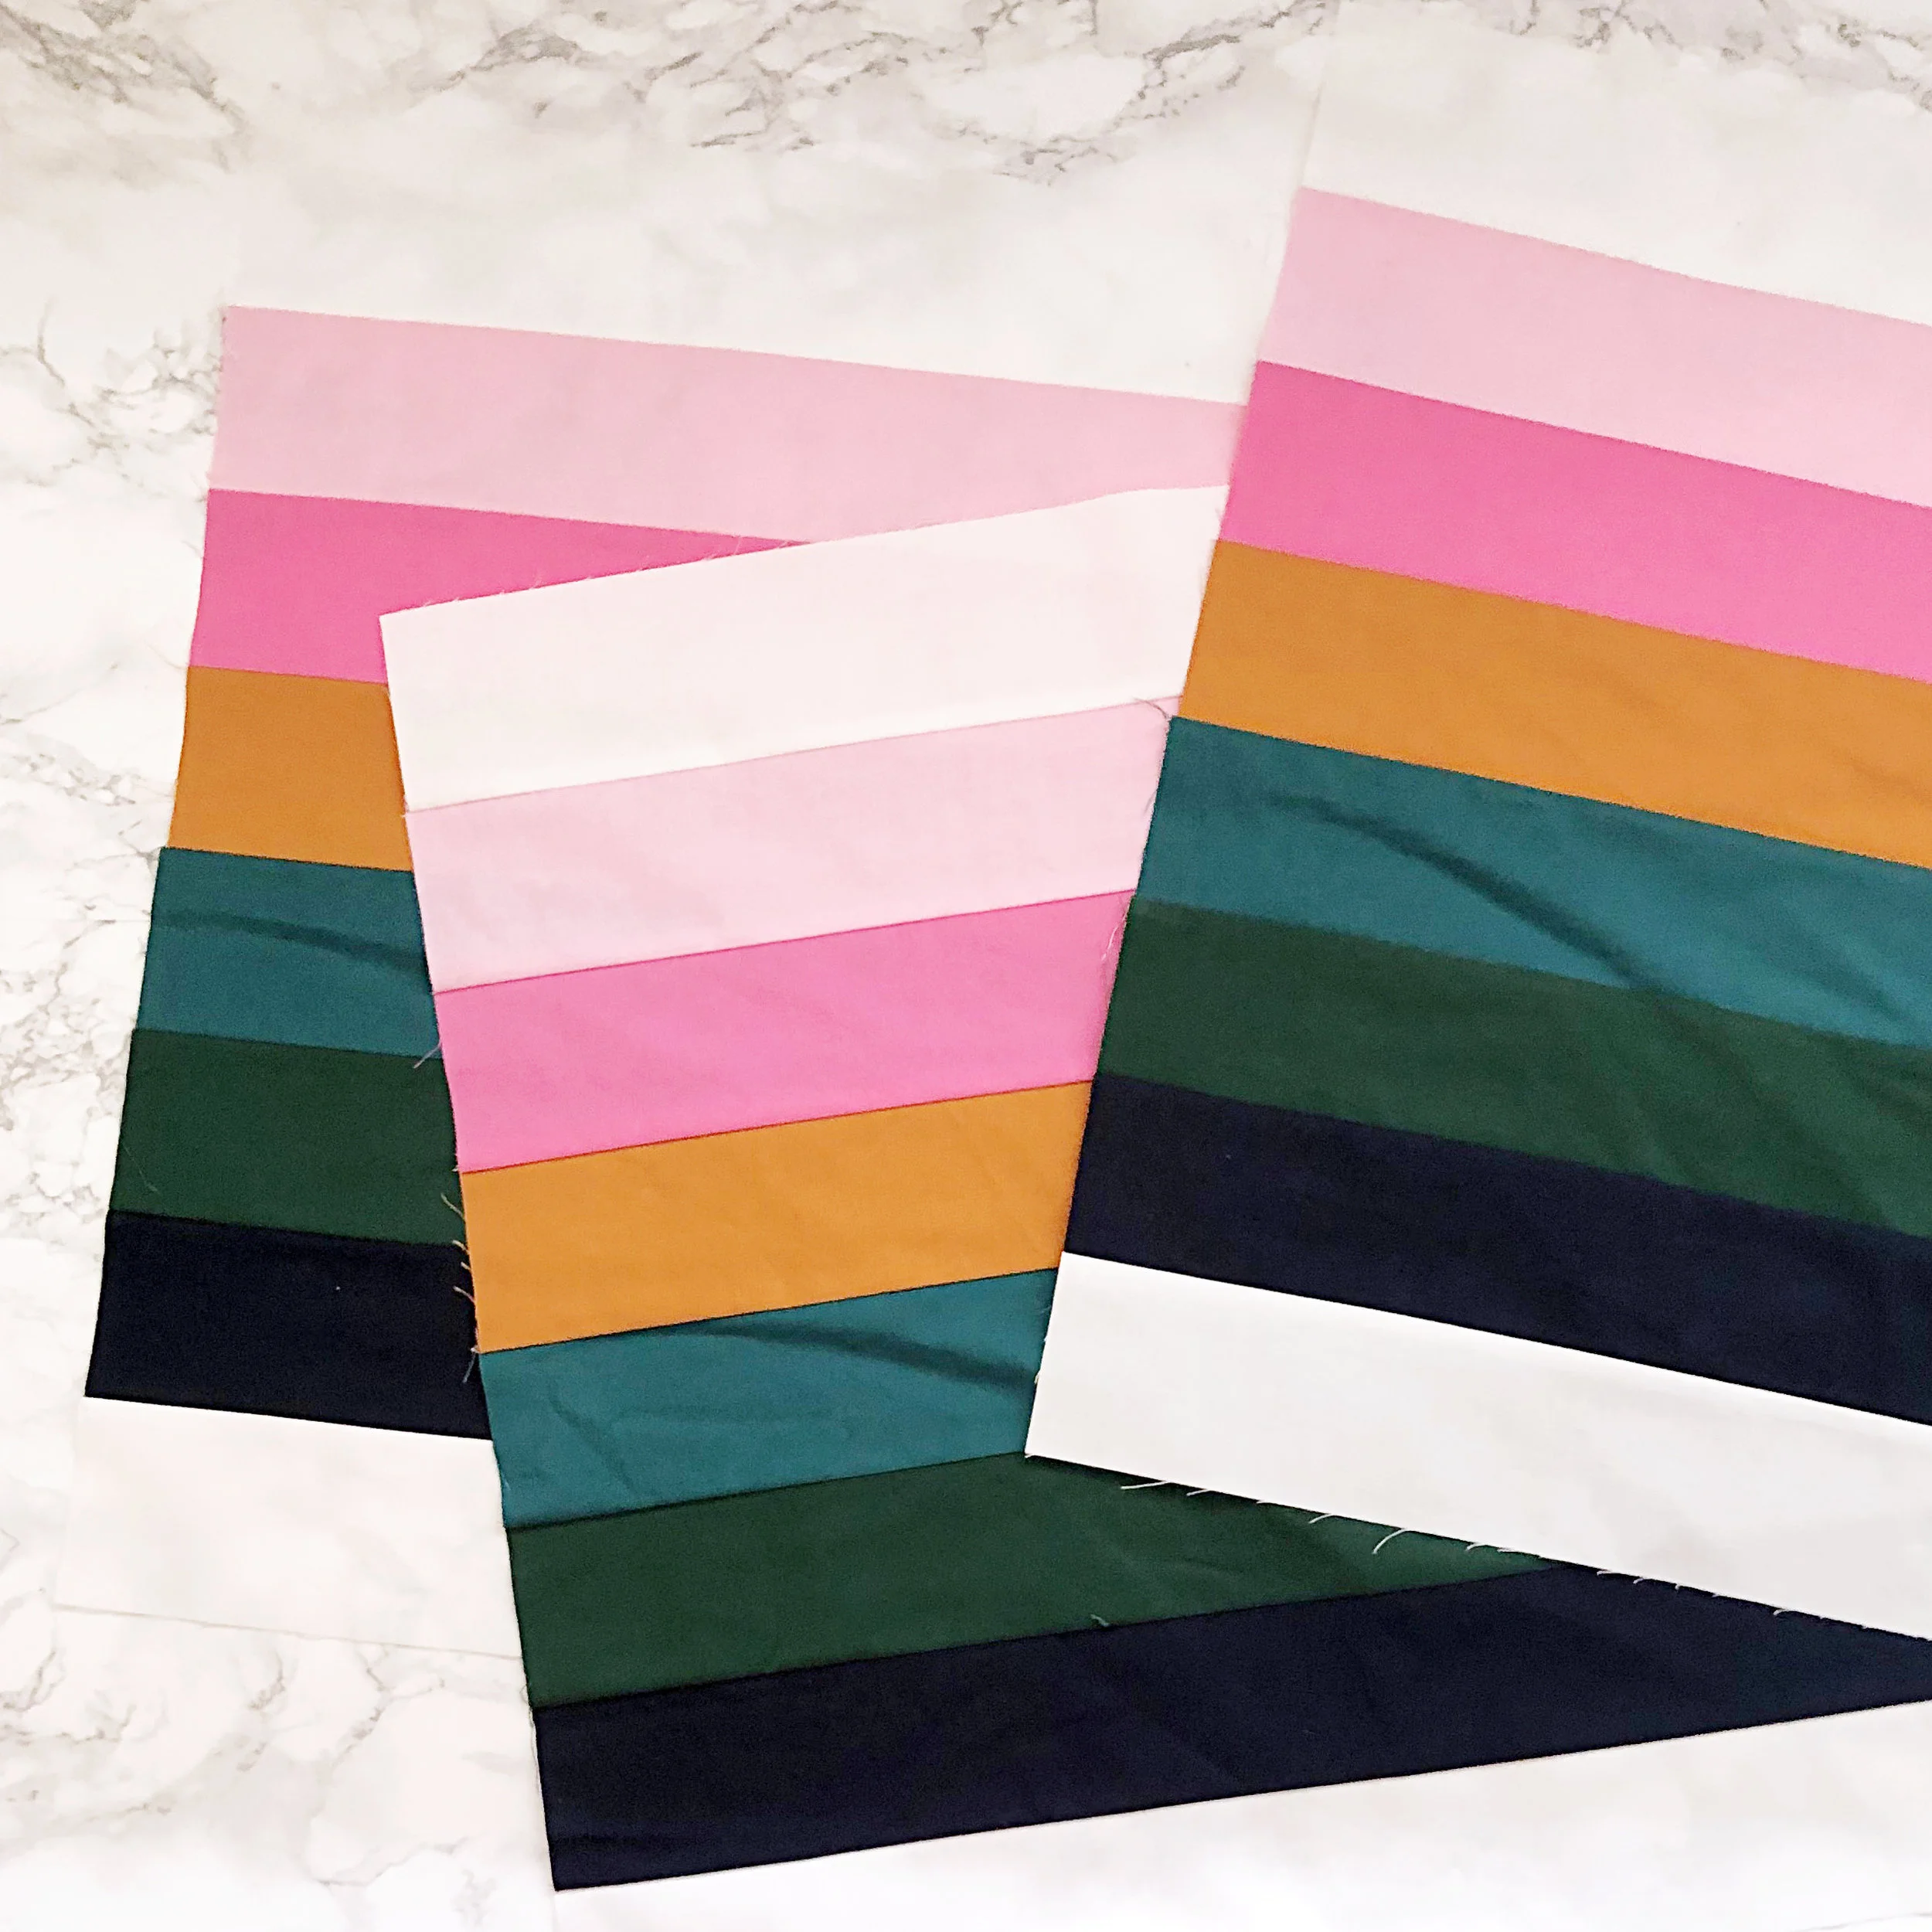
Block B is comprised of 6 colored strips with a background strip on each side. As usual I lay them all out so that I don’t accidentally connect them in the wrong order:

Stitch together the first background strip and the Fabric 1 strip. Don’t press yet.

Stitch the Fabric 2 strip to the Fabric 1 strip.

Keep going until all the strips are connected.

Repeat for as many straight blocks are in your layout.
Now, consult the layout diagrams in the pattern (page 8-9 in the PDF and 14-15 in the printed version) to see which direction to press the seams on each block. The arrow refers to the direction the seam allowances should be going. The pressing directions are such that seams of adjacent blocks go in opposite directions and will nest when you piece the blocks together, making it easier to line up all the stripes.
Here is what the three different pressing directions look like (two arrows means press seam open).

If you are making your own design, do your best to press seams of adjacent blocks in opposite directions. If you can’t, press them open.
That’s it for making Block B!
EXTRA TUTORIAL: SEWTOPIA STYLE SEAMLESS STRIPES
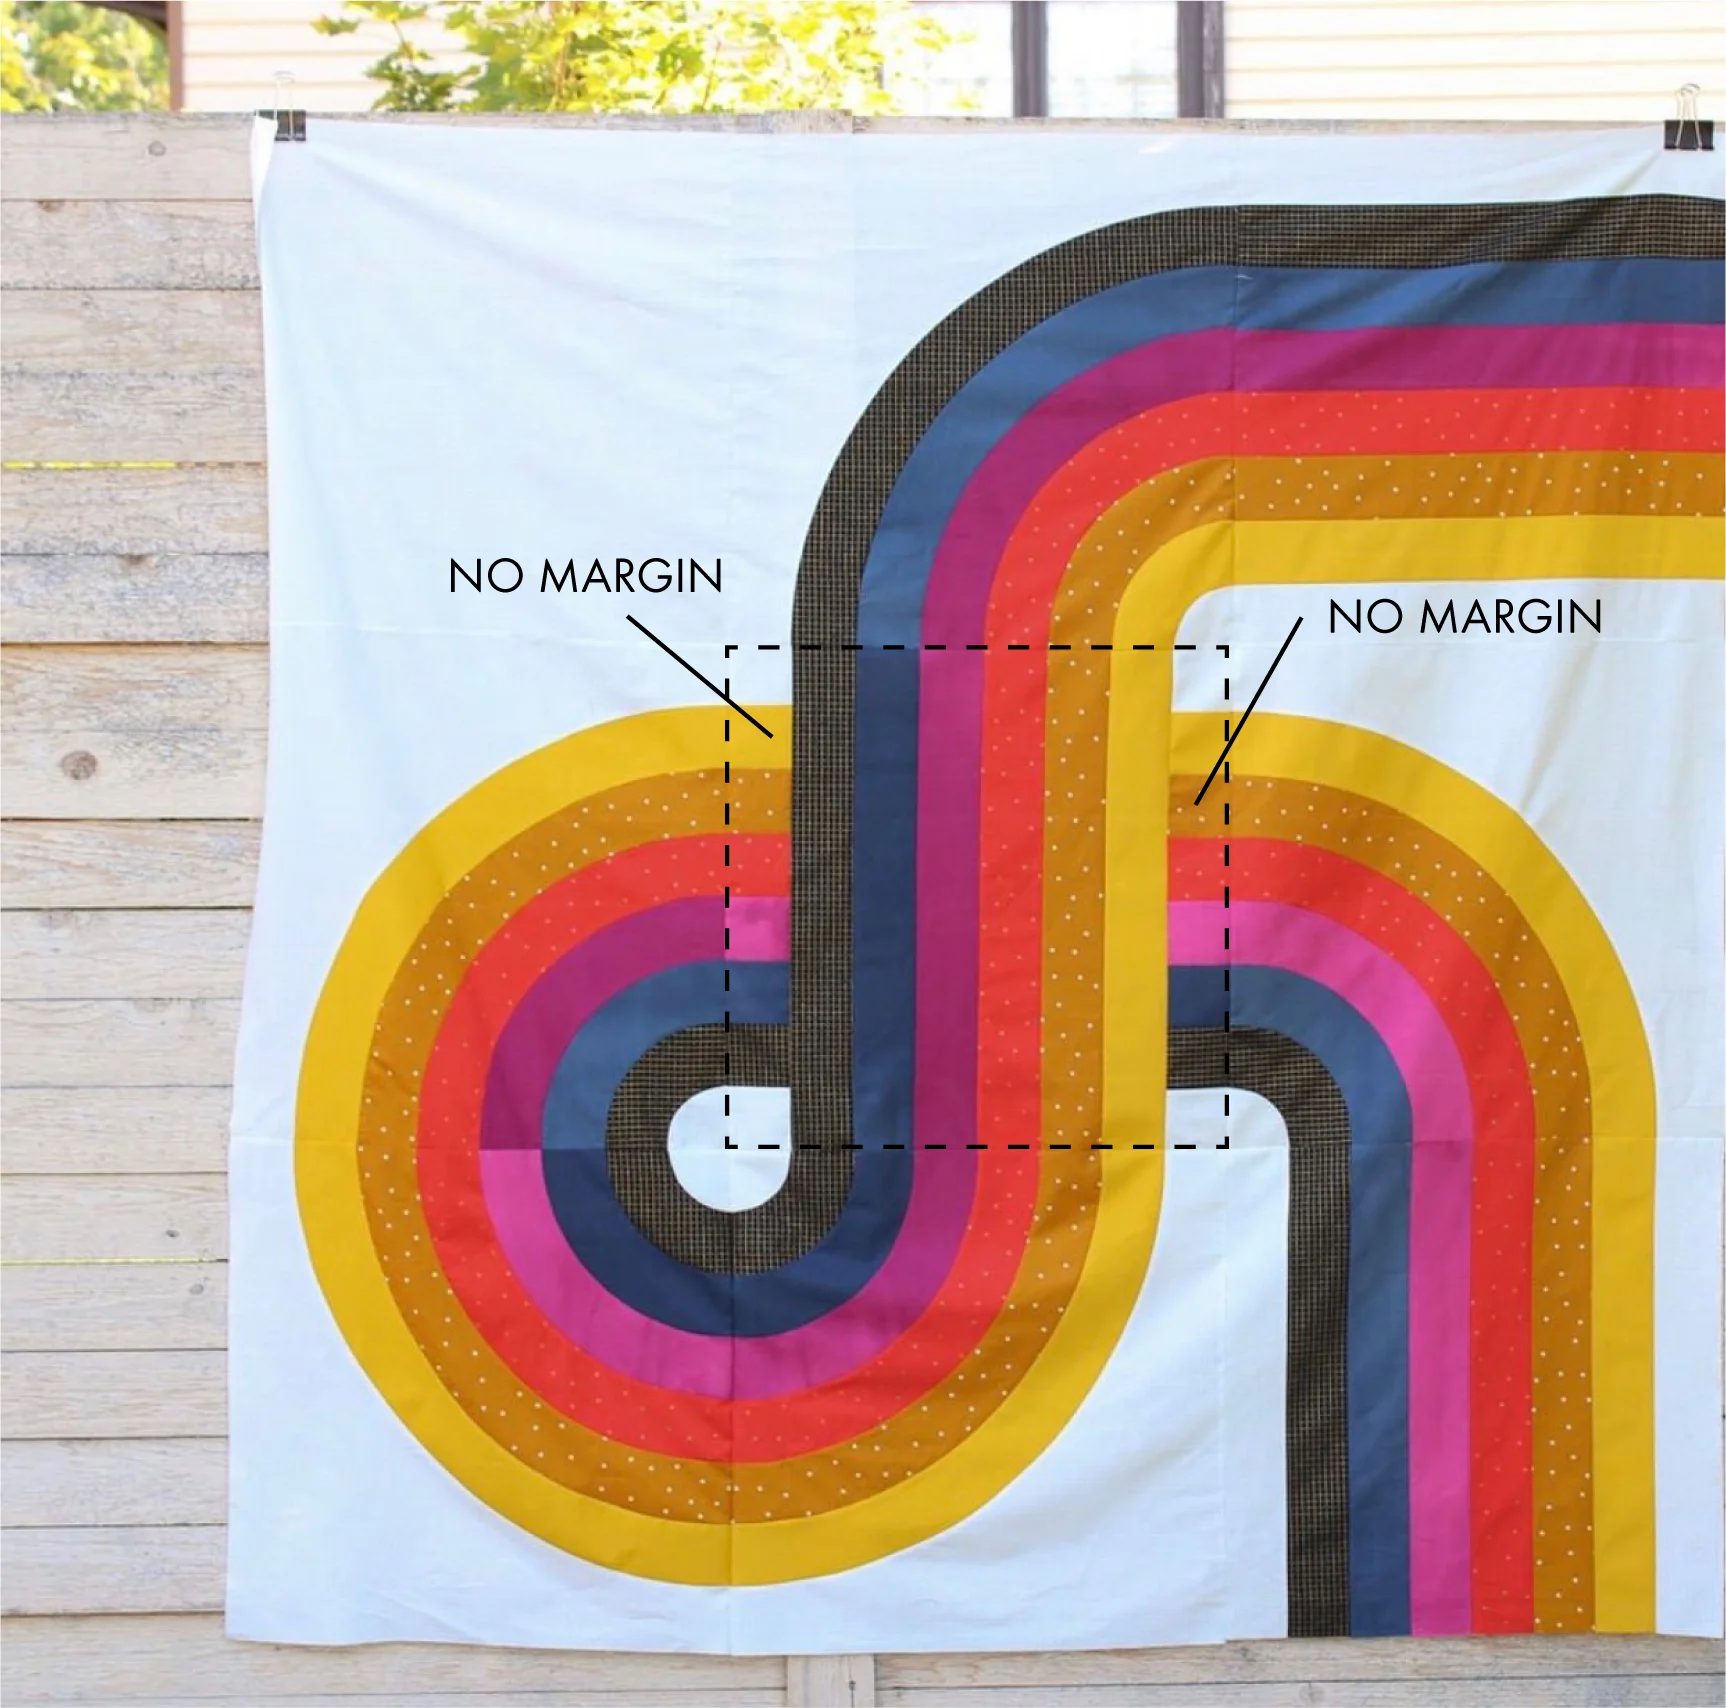
The background strips to either side of the colored stripes are part of the modular design of Looper - no matter which way you turn them, they line up with any curved block. However, that does mean that if you’re coming up with your own design and the stripe crosses over itself, there is a margin of background to either side of the “upper” stripe. I actually like this negative space from a design standpoint, but I also see how you might want to get rid of it to make it look more seamless.


Amy of Sewtopia just finished a freaking amazing Looper where she did just that. She eliminated the margin by constructing a special piece in lieu of each background piece. She suggested I do a tutorial, and I thought that was a great idea!
It’s super easy - if you want to have a seamless stripe, from your scraps simply cut a 3” square of each Fabric 1-6, and two 3” squares of the background fabric, and piece them together in color sequence order. Repeat to make another unit. Then, instead of attaching a background strip to each side of the Block B stripes, attach one of your new units to each side.

Be sure you are attaching each unit so that it lines up with the adjacent block, color sequence wise.
Another way to do it - if you have leftover 3” strips from cutting, sew them together to make an extra Block B, then slice off 3” pieces of that until you have enough.
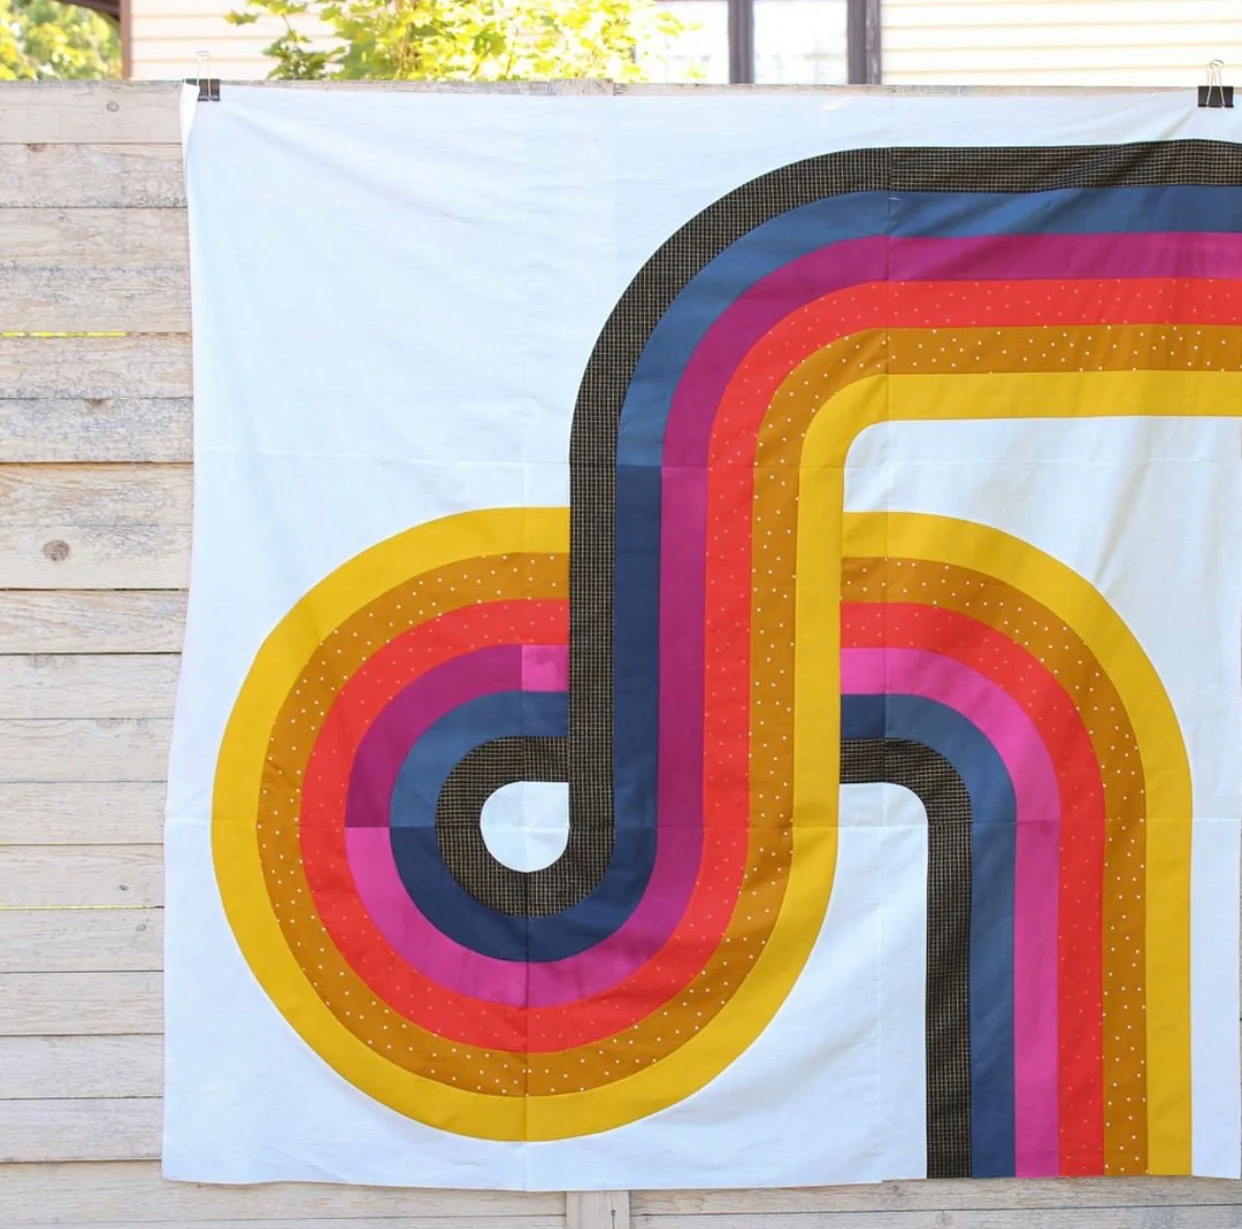
Bam! Seamless stripes!
In CONCLUSION
That is it for this week! Super easy! So your goals are:
Baby size: finish piecing all your blocks if you haven’t yet.
Throw/Queen size: Piece all your Block B’s (3 for throw, 5 for queen)
Your own design: Piece all your Block B’s, and finish up any curved blocks you haven’t done yet (so basically piece all your blocks)
Next week we FINISH OUR QUILT TOPS!
PRIZE TIME
To win the Oliso Mini Project Iron, simply keep posting photos of your Looper progress on Instagram using both the hashtags #looperquilt and #looperqal. These need to be static posts in your grid, not stories. It can be pictures of your cut pieces, pieced blocks, finished quilt, anything Looper related! Photos posted between 8am Monday Sept 2nd and 8am Monday September 9th (all times EST) will count as entries. Open to international people too (though for this particular one it’s a North American electrical cord so I will choose a random winner from North America!). You must be actively on the email newsletter list to win.
(And as usual, all posts with both those hashtags are also entries for the grand prize, which is complimentary longarm quilting by Kaitlyn of Knot and Thread Design for a throw sized Looper! This is an awesome prize so keep on posting!)

