Hi.
I like to make things.

I like to make things.
Need a little help with curved piecing? Or maybe just a confidence boost? Below find all the steps for making block A1/A2 of the Looper Quilt.
But first, a few bits of advice:
Practice. Especially on the smaller pieces - cut a few extras (you can use scrap fabric) and practice some of the smallest curves before you sew the real deal. Do it as many times as you need.
Bigger curves first. Out of practicality the instructions go from smallest curve to largest, but if you practice the smallest curve first and find it difficult, try sewing one of the larger curves first. A larger curve is going to be more gentle, and will feel more like a straight line.
SEWING CURVES IN LOOPER
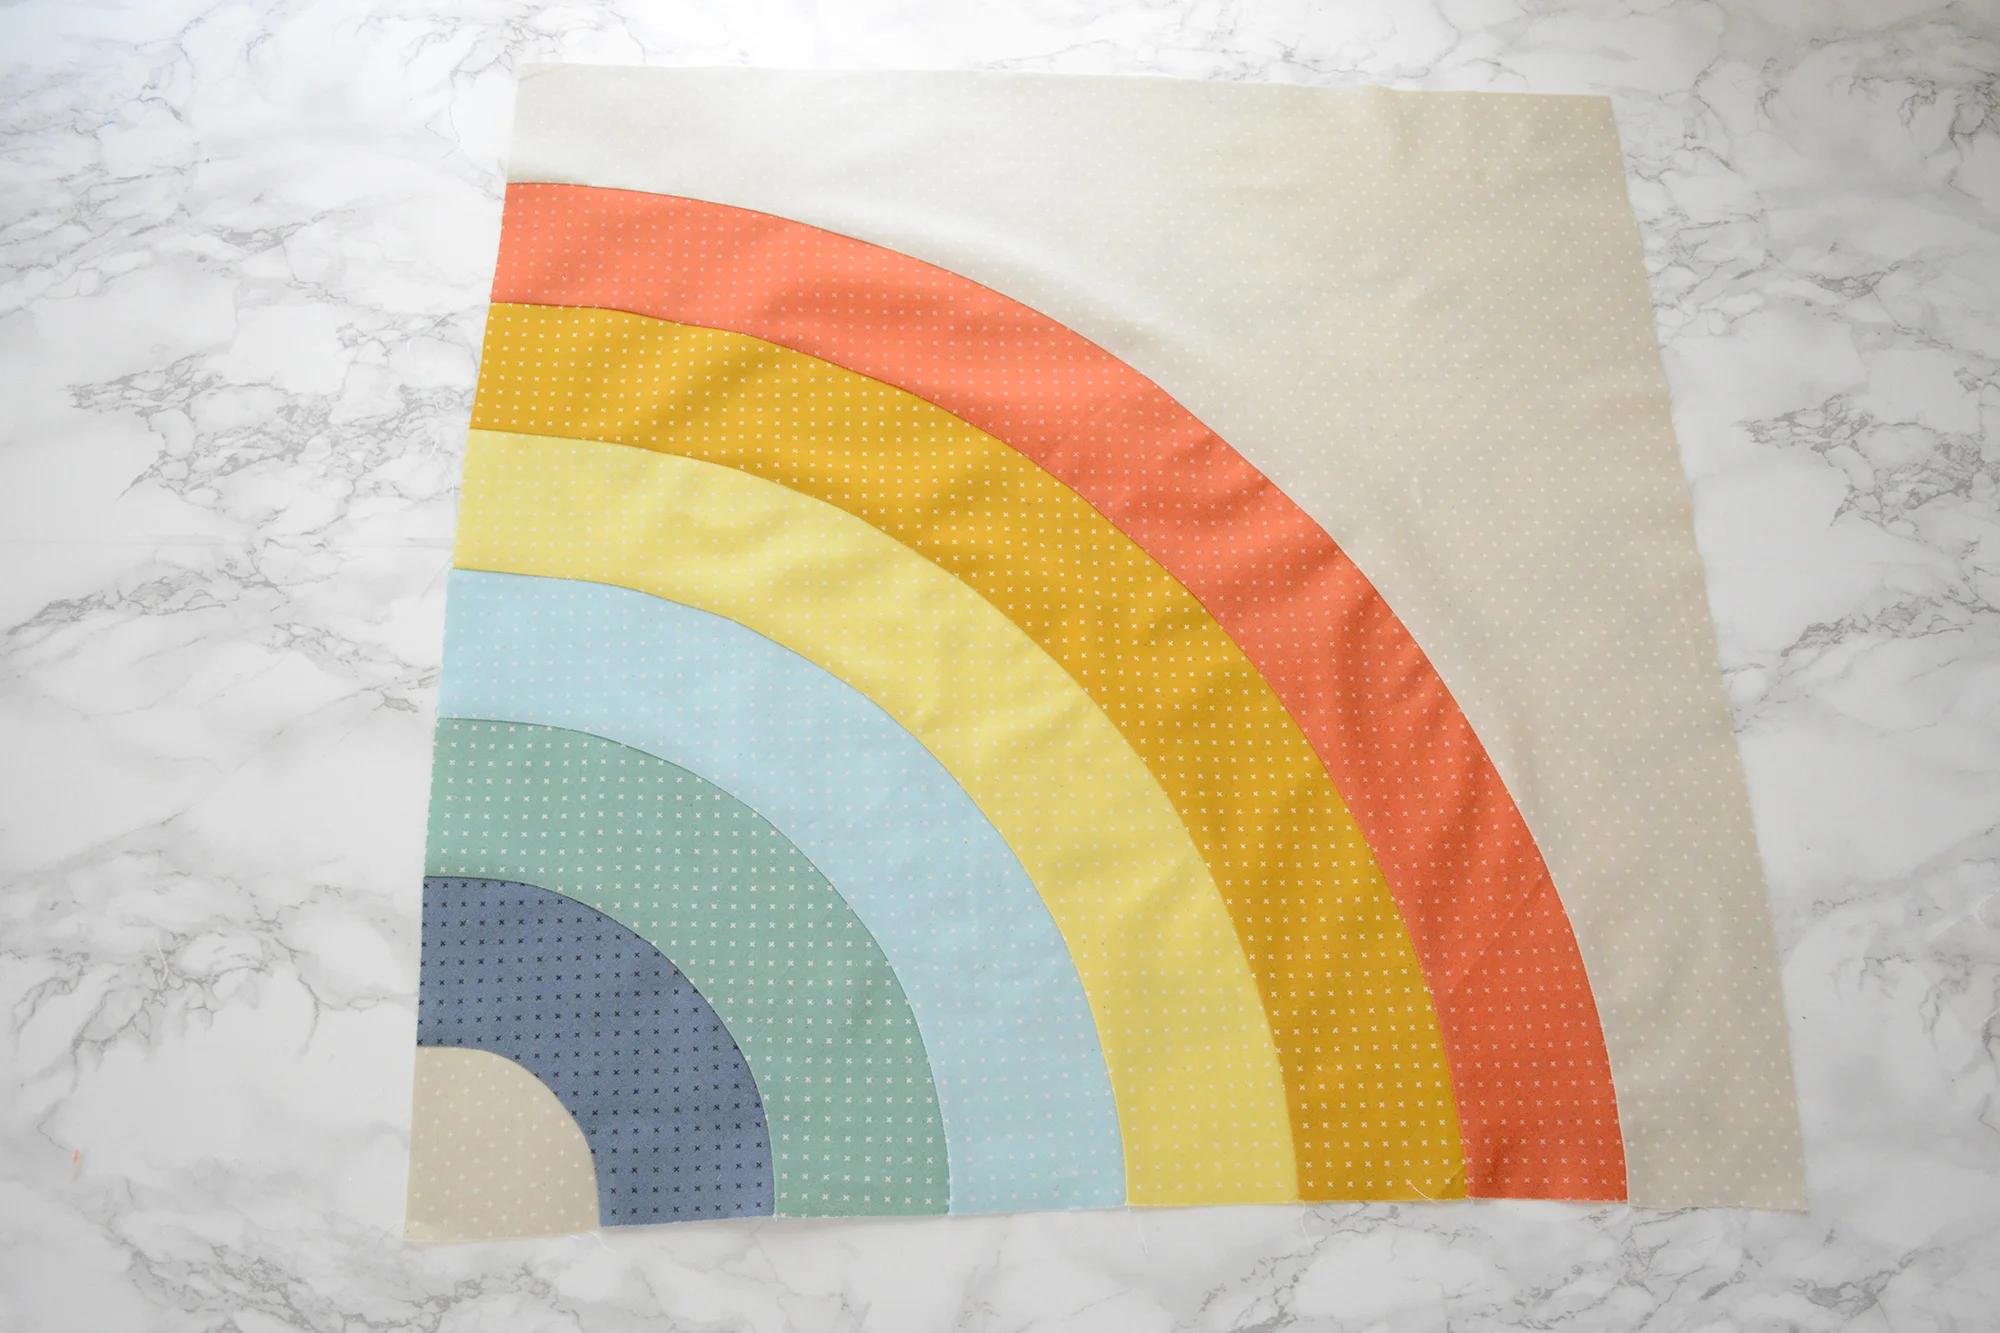
Here are all the cut template pieces for one Block A1/A2. It helps to lay them all out like this so you can see which one goes where. (Remember to handle the cut pieces very, very gently as it’s easy to stretch them out and distort them at this point!)

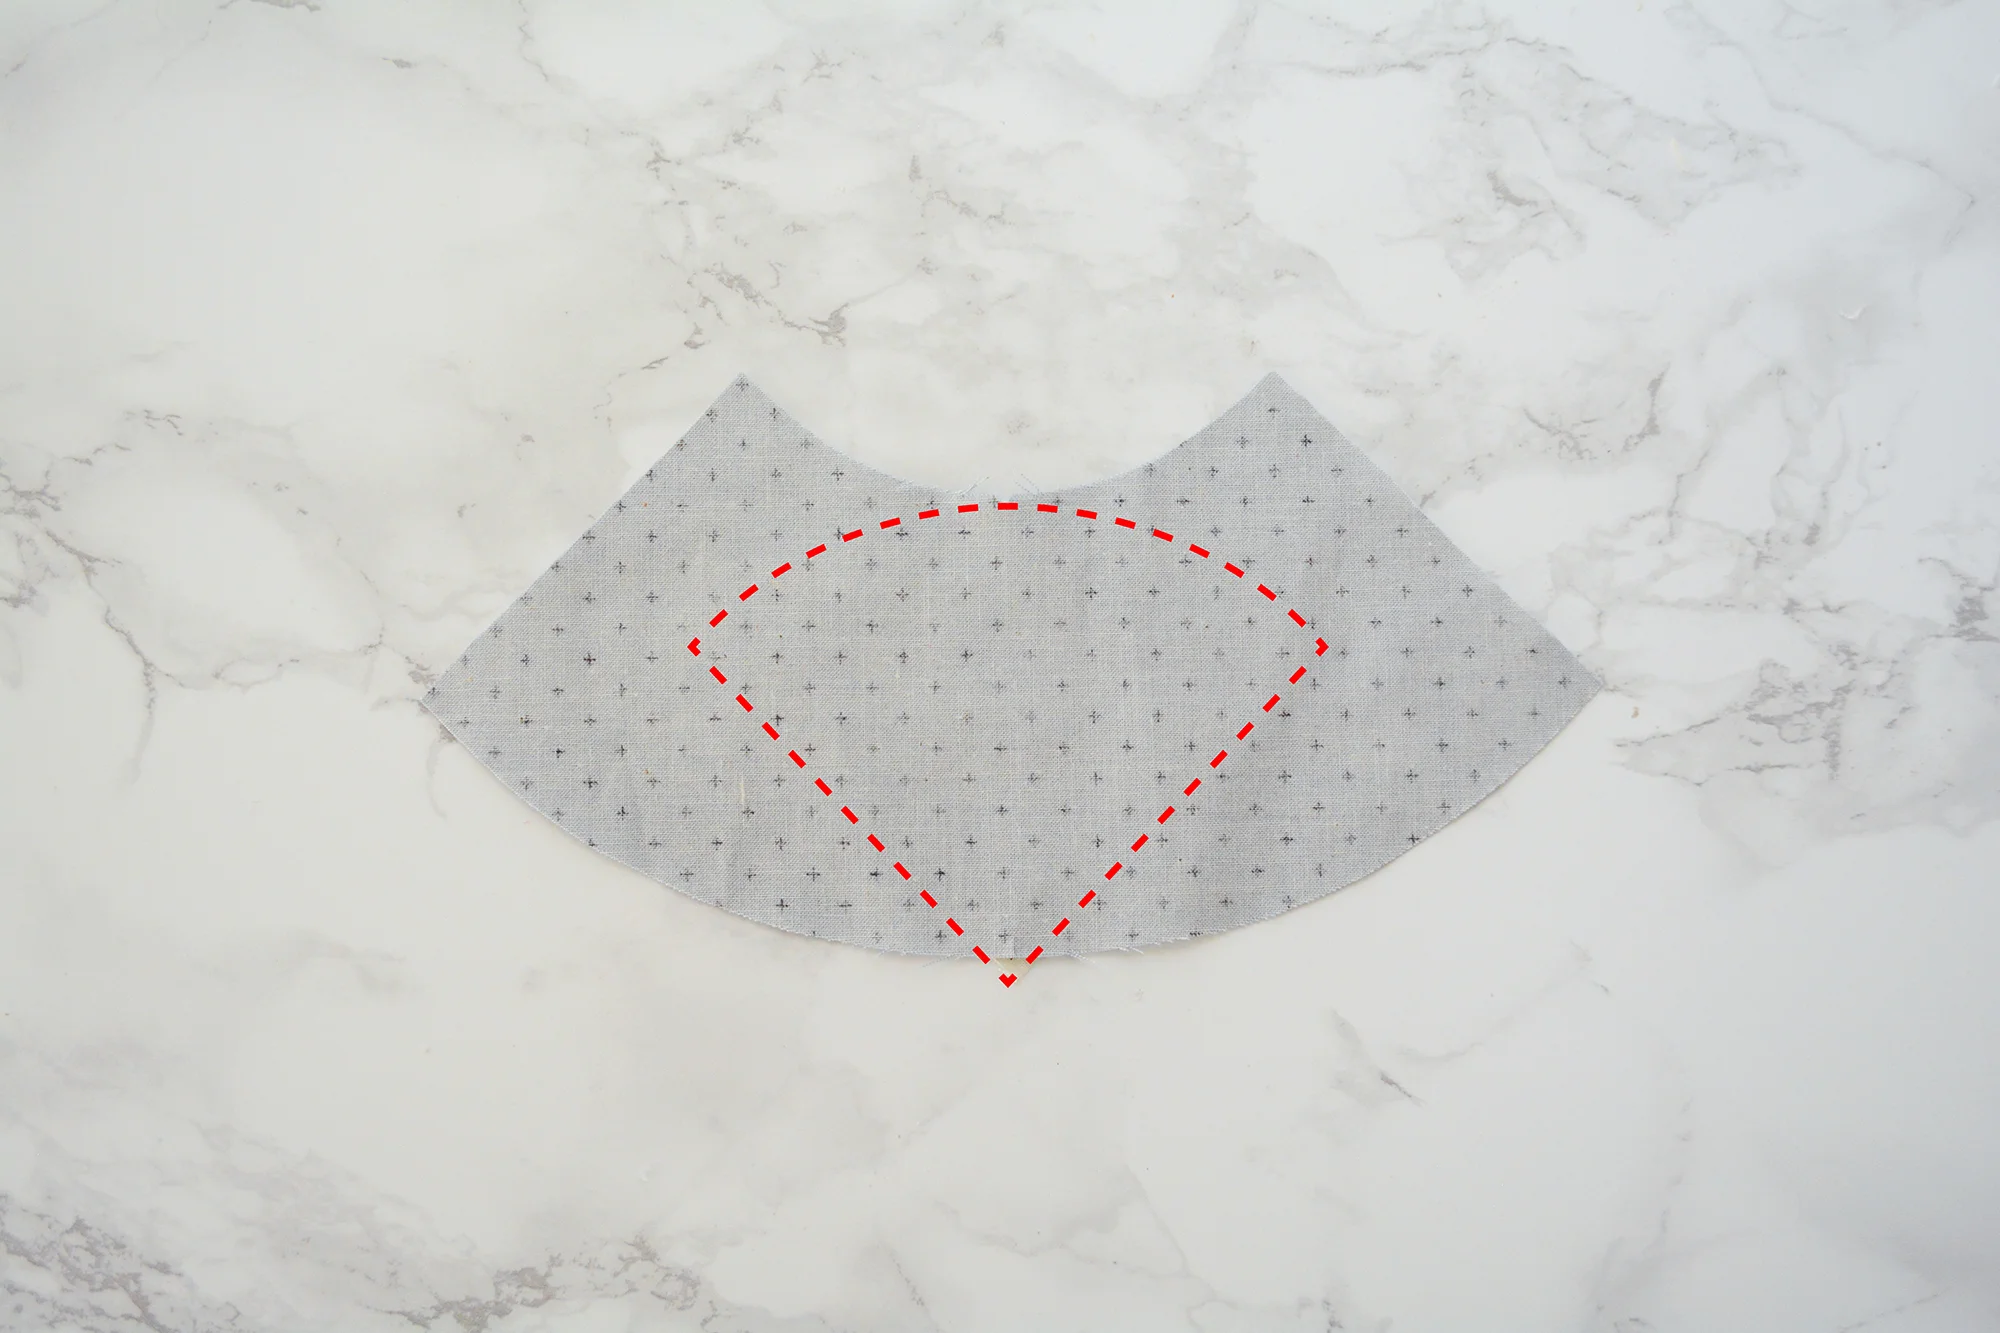
We’ll start with pieces A and B. Lay them out as shown below, with their matching curved edges facing. Find the center notch in each edge (marked in red in the photo).

Flip B (the larger piece) down over A so that the pieces are right sides together, and align the notches right at the raw edge. None of the other edges will be lined up at this point, that’s ok. Red outline shows placement of A under B.
Pin at the center notch. Then, bring one straight edge of B over to line up with the closest straight edge of A, alining the corners of the curved edges. Pin.

Do the same thing with the other straight edge. The B piece (the one on top) is going to get all foldy and bumpy. That’s ok; you’re just worried about that top curved edge.

Here’s a view to see piece A in case that helps with your visualizing.
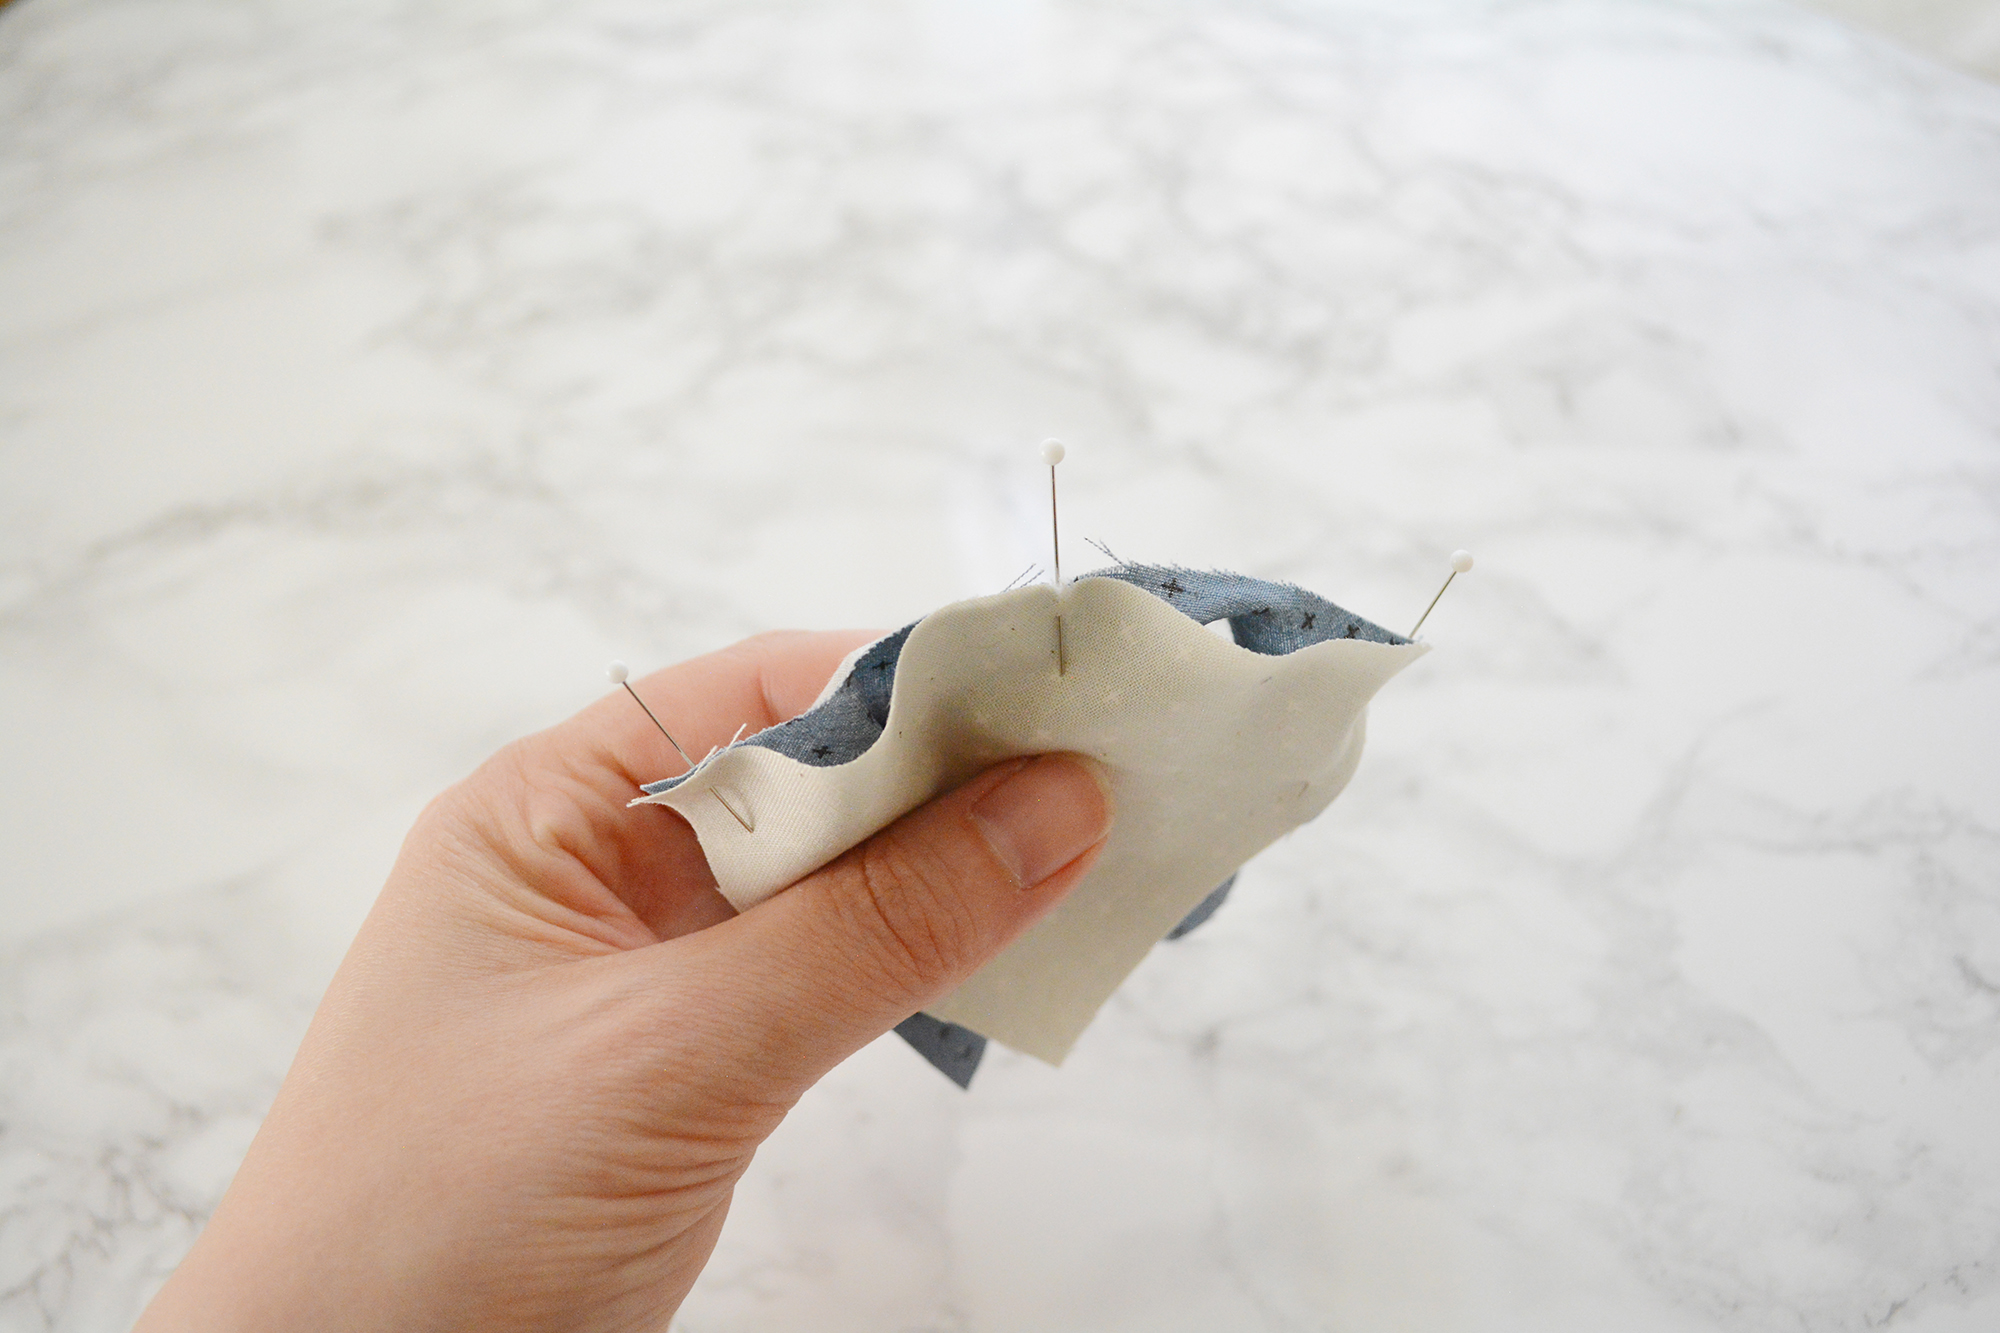
Put a few more pins along the curved edge, making sure the raw edges are aligned as you do. Yes, the curves of these edges go in opposite directions, but you can make them line up! You are the boss! Don’t be shy with pinning. If there is any time to use pins it’s now.

Now sew along that curved edge with a 1/4” seam and with piece B on top. I highly recommend using a 1/4” presser foot and turning your stitch length down to 2.0. Go slowly and sew all the way up to the pins before taking them out.

Again, piece B is going to be mega wrinkly, but all you are concerned about is how things look right at that 1/4” stitching line, which should be laying pretty flat. If you think you are about to sew over a pucker, stop, sink your needle in the fabric, and raise the presser foot to smooth everything out. (Don’t forget to put the foot down before you start sewing again.) In the photo below, you can see that there’s a big ol’ wrinkle just to the left of the foot, but at the stitching line everything is A-OK.

Here’s what it looks like once sewn. If you think you have a little pucker, try pressing it before doing any seam ripping. A lot of times they will press right out.

Press piece B up and away from piece A (so you are essentially pressing the seam allowance towards piece B). Don’t drag the iron around when you’re pressing because again, it’s easy to distort the edges of the curved piece. A spritz of water will help melt everything right into place. (These curved seams are really satisfying to press FYI)

Keep adding curved pieces in increasing size order, following the exact same steps. Here’s the next piece, template C.

Flip it down over the same way, align notches and pin at the center.

Align both straight ends and pin.
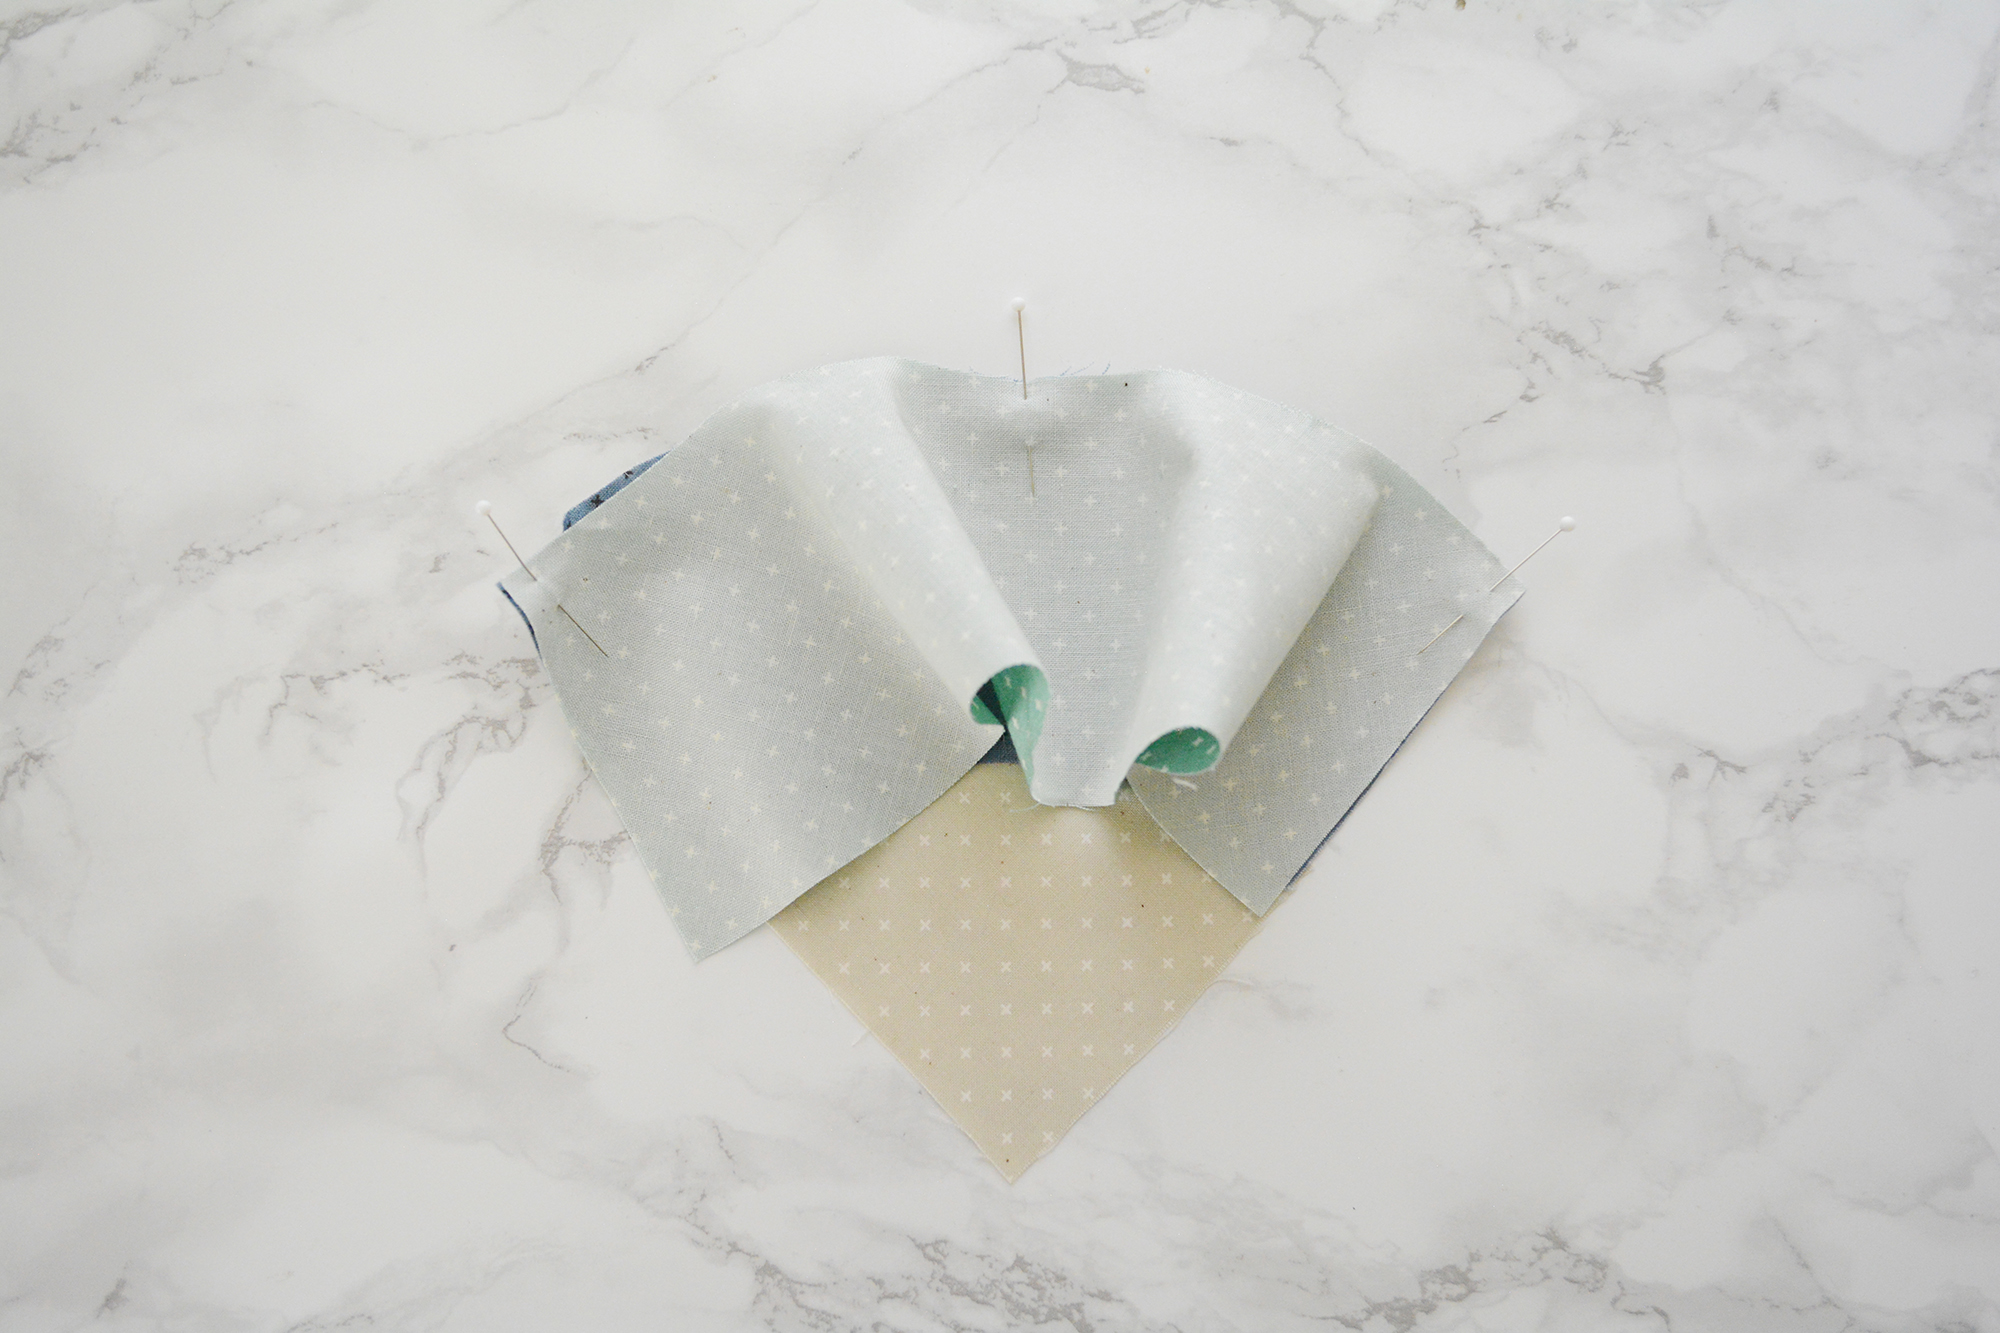
Put it any extra pins to feel secure and stitch that edge at 1/4”.

Press newest piece and its seam allowance away from first pieces.
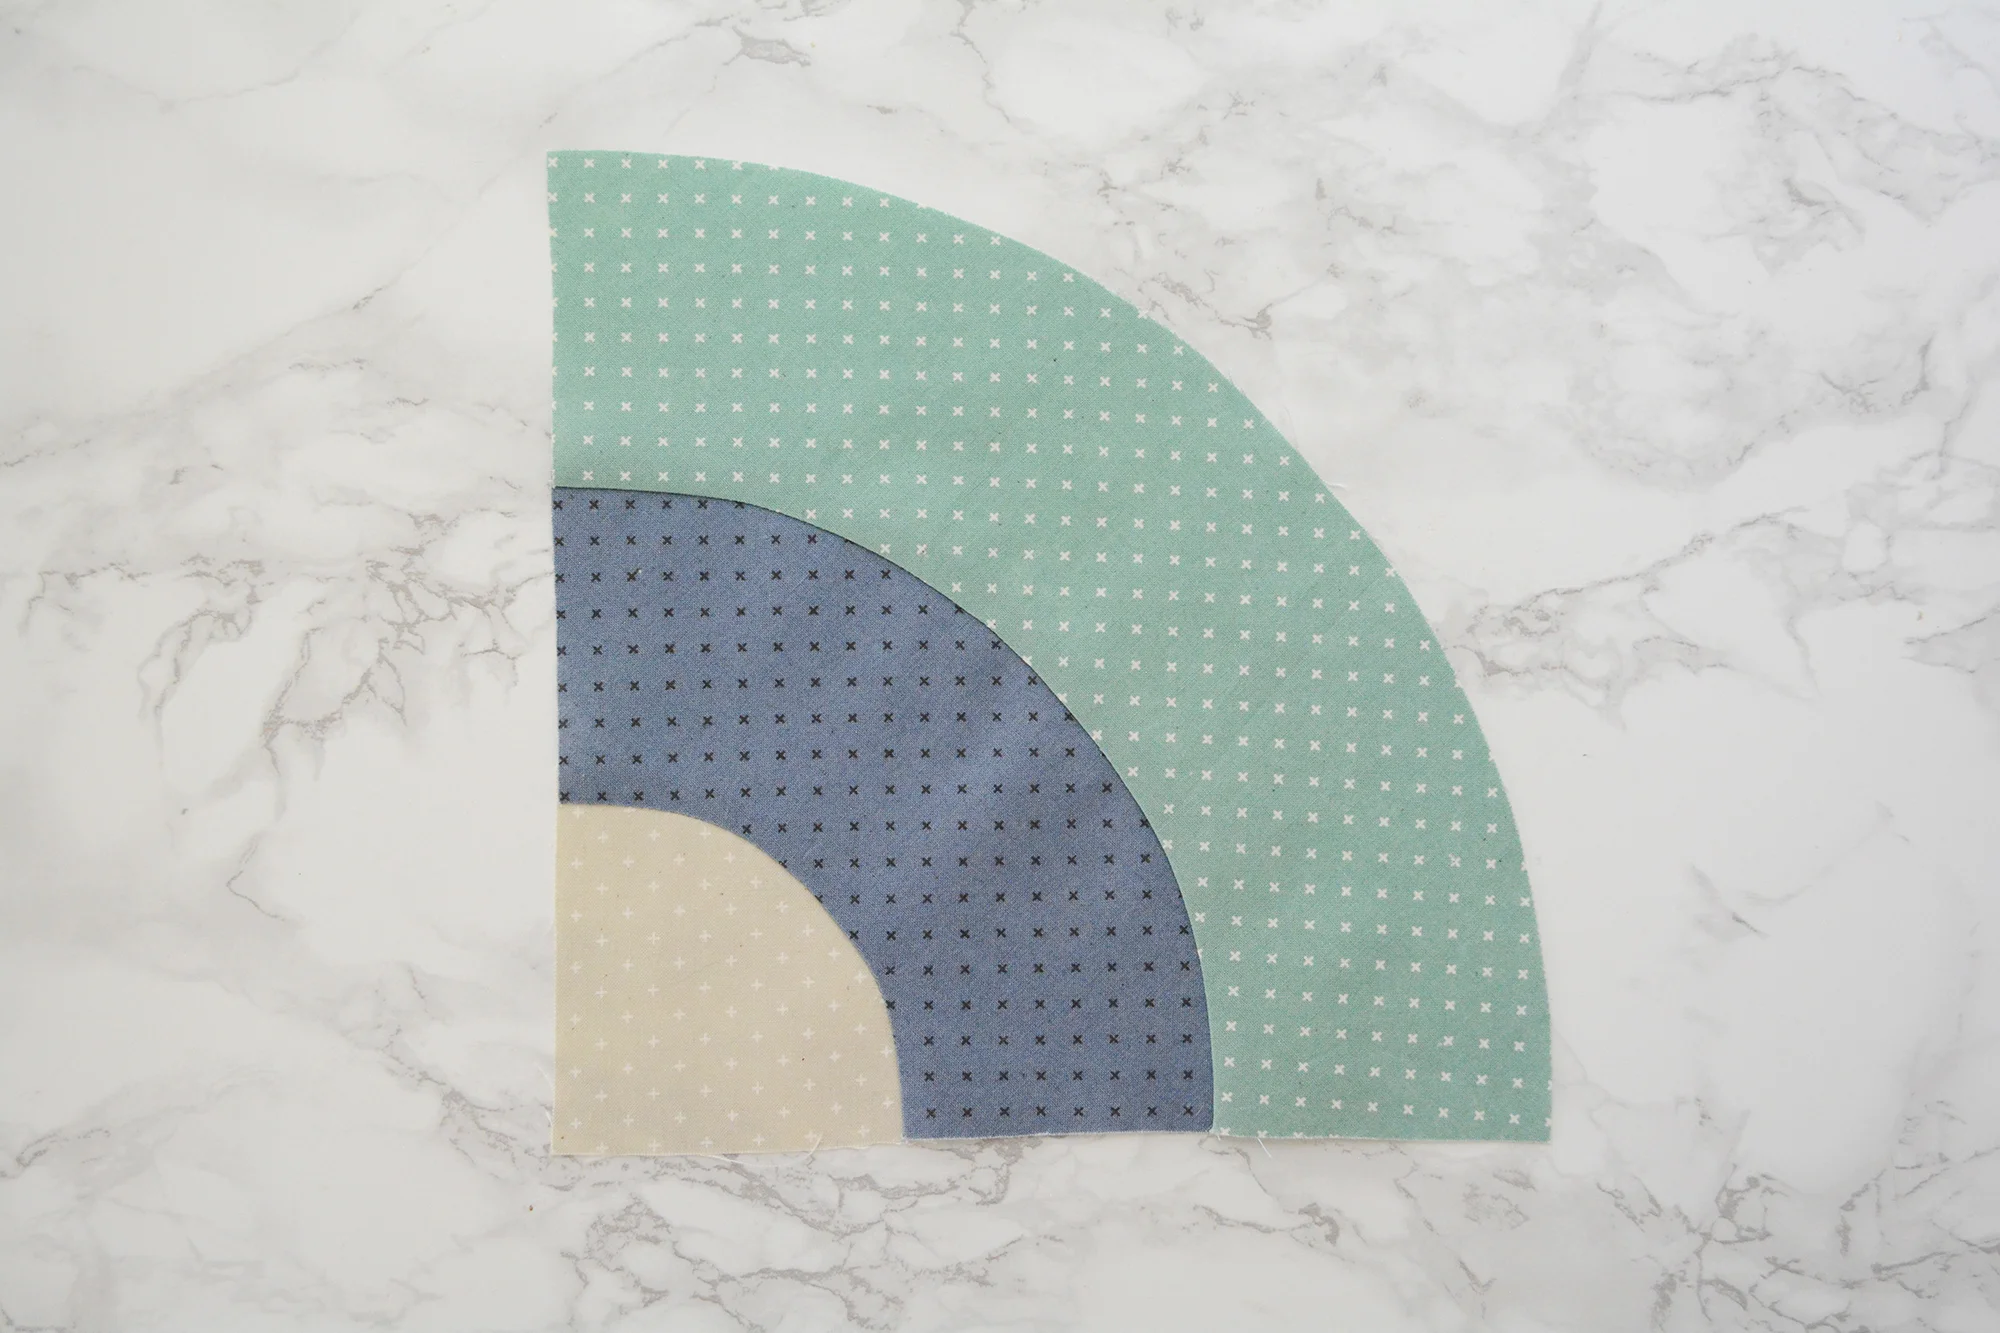
Keep adding pieces until your block is finished! Now is a good time to measure and trim your block if necessary. It should be 20.5” square (though you don’t want to trim off a ton, otherwise your stripes won’t line up. I wouldn’t trim more than 1/8” off any one edge).
Once you are comfortable, you’ll find it quicker to batch sew your seams. So for instance, pin and sew all your A/B seams in the quilt at once. Then pin and sew all your B/C seams, etc.
Like anything, it might take a few tries to feel comfortable sewing curved seams. That’s ok! It’s totally doable, and with a little time and a little practice you’ll soon be zipping through these seams like they’re nothing.
Here is the finished quilt made with this block. Get the Looper pattern here!