

Hudson Bay Point Blanket Quilt and Free Pattern
If I could figure out how, I'd move to a wintery cabin in the woods for the rest of my life.
Ok maybe not the rest of my life. But I would go there often.
I like blankets. I like making them. I like snuggling them. My faux fur and fleece throw from Target is one of my favorite possessions. Just give me a warm crackling fire while the icy wind howls outside and I am one happy girl.
I've loved Hudson Bay Point Blankets for a little while now, but when I saw the Purl Bee's knitted baby blanket version, I was pretty inspired. So I decided to make a quilted version.
*UPDATE: This quilt has now been listed in my etsy store*
When I told a few people what I was making, instead of responding with, 'ohhh, a quilted Hudson Bay Point Blanket, why didn't I think of that,' they just stared at me. Nobody had any idea what the hell I was talking about. So allow me to give a little background.
 |
| photo courtesy of vintagebutterfly94 |
The traditional stripes of indigo, yellow, red and green became popular and were easily reproduced with colorfast dyes of that era.
Now they are iconic collector's items. And guess what, the British company is still in business and still making blankets.
The smaller indigo hash marks along the right edge are actually a nifty little feature - they allowed those trading with the blankets to know the size of the blanket without unfolding it. That's why they are called point blankets. The more hash marks or points, the bigger the blanket. Cool huh? I think so, at least.
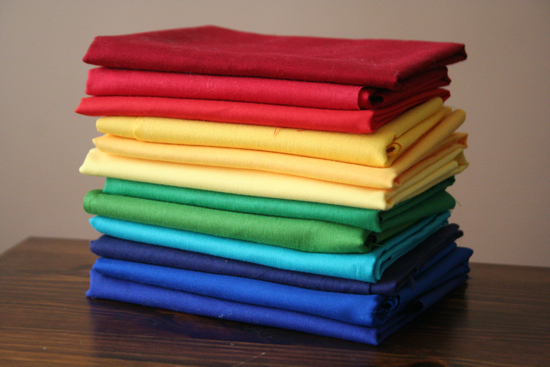
Instead of doing solid stripes, I pieced each stripe with three different solids. I wanted the final product to really read 'quilt,' so I was going for that patchy look. The green was a little tricky because it was more of a bluish kelly green [like the 'jungle green' Crayola crayon, the colors from a box of 64 will forever be the basis of my color identification]. I added in a few teal blocks with regular kelly green and I think, from a distance, the effect kind of works.
The back is a homespun looking maroon and tan gingham. I thought it added to the wintery-cabiny-snuggliness.
For the binding I used a navy plaid.
The quilt's dimensions are about 48" x 78". Perfect for sitting in the sunny grass.
If you'd like to make your own Hudson Bay Blanket quilt, here are some quickie directions for piecing the top. Please leave a comment if you have any questions! Note: I did not include dimensions for all the piecing in each colored stripe. I honestly just did it randomly and stopped when it was the right length. So just piece a random strip, then trim it down to the dimensions listed below. Also, for all the A and B white strips, I actually pieced them together in 2 parts, since I was cutting crosswise on the fabric and could only get a 43"ish strip. But if you want you could get enough fabric to be able to cut 48" lengthwise and cut those pieces all as one piece. Make sense I hope?

CUTTING:
A: 6.25" x 48" [cut 2 from white]
B: 3.25" x 48"[cut 6 from white and 2 each from red, yellow, green and blue]
C: 41.5" x 33" [cut 1 from white]
D: 1.25" x 7" [cut 3 from dark blue]
E: 2.5" x 7" [cut 1 from white]
F: 2" x 7" [cut 2 from white]
G: 26.25" x 7" [cut 1 from white]
Use a 1/4" seam allowance.
Join one A piece and 7 B pieces, working from A in towards the center, in the following order: A, B[blue], B[white], B[yellow], B[white], B[red], B[white], B[green]. Repeat for other set of A and B pieces.
Join D pieces with F pieces in this order: D, F, D, F, D.
Join E piece to one end of F/D piece and G to other end.
Join pieced hash mark strip to short end of C.
Join one striped piece to each side of center white piece.